ProTools 101: Lesson 10

1.What term is used to describe an audio patch point that applies a signal processor directly into the signal path on a track? How many of these patch points does Pro Tools provide on each track?

2.What term is used to describe a signal path carrying a mix output of one or more tracks routed for parallel processing? How can this signal be returned to the sending device?

3.What menu would you use to display or hide the Mix window? What keyboard shortcut can you use to toggle between the Mix and Edit windows?

4.What menu command can you use to display or hide an Inserts or Sends view area in the Mix window?

5.What type of plug-in provides real-time processing? What type provides non-real-time processing?

6.What are some commonly used plug-in options for EQ and dynamics processing in Pro Tools?

7.Which Pro Tools automation mode discussed in this lesson records changes to track controls in real time when playing back the session?

8.What is the difference between Read mode and Off mode? Which mode allows you to play back existing automation on the track?

9.What track control can you use to display an automation playlist? What window are automation playlists displayed in?

10.What tool can you use to add, move, or delete automation breakpoints? What modifier can you use to delete a breakpoint by clicking on it?

11.Why is it important to back up your Pro Tools sessions? What are some ways in which your Pro Tools work can be lost accidentally?

12.How is the Save Copy In command different from the Save As command, in terms of the files that are saved?

13.Which session will be open after completing a Save Copy In operation: the original or the copy? How is this different from the Save As operation?

14.What command can you use to save a session with a different sample rate or bit depth?

15.What are some considerations for bouncing audio in Pro Tools? How is the bounce affected by soloed or muted tracks? How is it affected by the active selection?

16.What command lets you mix your entire session directly to a stereo file? What file types are supported for the bounce file with this command?

17.What bit depth and sample rate should you use when bouncing if you plan to burn the file to CD without further processing?

18.How can you add audio files to iTunes for use in burning a CD??

ProTools 101: Lesson 9

  1. What does the Loop Playback option do? What is the minimum loop length required for loop playback? 

Loop playback allows you to repeat your selection continuously, looping from the end of the selection back to the start without interruption. Loop playback requires a selection at least 0.5 seconds in length

2. What happens when you delete a clip from between two existing clips in Shuffle mode? What happens when you do the same thing in Slip mode? 

Subsequent clips on the track will move to the left to close up the spacei.e In Shuffle mode when you move or place clips on a track, their placement is constrained by other clips. Editing a clip in Slip mode has no affect on subsequent clips, unless the edit courses clips to overlap in which case the underlying clip is trimmed rescued by the overlying clip.

3. What happens when you move a clip whose start point falls between Grid lines in Absolute Grid mode? What happens when you do the same thing in Relative Grid mode? 

If a clips start point falls between gridlines, moving the clip will snap its start time to the nearest grid lineIn Relative Grid mode, if the clip’s start point falls between gridlines, the clip will move in grid increments, preserving is offset from the grid.

4. How can you configure the size of the Grid increments used in Grid mode? How can you display or hide the Grid lines in the Edit window? 

1. Click the GRID VALUE pop-up selector in the toolbar area of the Edit window.

2. From the GRID VALUE pop-up menu choose an appropriate timescaleClick at the head of the currently selected main Timebase ruler or click on the Grid indicator in the toolbar.

5. Name some common editing commands provided in Pro Tools.

 Cut, Copy, Paste, Clear (delete), Duplicate, Repeat

6. What are some operations that the Separate Clip command can be used for? 

1. To split a clip into two separate clips at the insertion point.

2 . To separate a selection from a large clip from the material on either side.

3. To create multiple new clips from a selection dividing the selection of specified intervals or events.

7. What happens when you click on a clip with the Grabber tool in Spot mode? 

The Spot dialogue box will appear

8. What is the Trim tool used for? What modifier can you use to reverse the direction of the Trim tool? 

The Trim tool can be used to dynamically adjust the length of a clip. By trimming the head or tail of an audio clip, you can eliminate unwanted material the proceeds of follows the portion that you want to retain. opt to reverse.

9. What is the Nudge value used for? In what Edit modes can the Nudge function be used? 

Pro Tools allows you to adjust the placement of clips and selections in small, precise increments using the keyboard. The size of these increments, known as the Nudge value, is set much like the grid size. Nudging a clip allows you to move the clip incrementally by predefined units.

-can be used in any mode

10. What keys are used to nudge a clip or selection earlier or later on a track? 

Alpha numeric plus [ + ] to move the clips later in the track, or minus [ – ] to move the clips earlier.

11. How would you go about creating a fade-out at the end of a clip? How would you go about creating a crossfade between two adjacent clips? 

To create a Fade Out

1. Select the ending of a clip (shift+click on additional tracks to create fades on multiple tracks whose clips begin or end simultaneously)

2. choose EDIT > FADES > CREATE or press cmd+ F. The Fade out dialogue box will appear. Choose the desired settings in the dialogue box and clock OKTo create a Crossfade 1. Make a selection across the boundary between two clip. 2. EDIT > FADES > CREATE or press cmd+ F. The Crossfade dialogue box will open.

3. Choose the desired settings in the Crossfade dialogue box and click OK.

12. How many levels of operations can you undo in Pro Tools? What are some operations that cannot be undone?

64. Deleting tracks, closing a session and/or quitting Pro Tools, clearing audio from the Clip List, recording in Destructive Record mode (covered in advanced courses)

13. How can you display the Undo History window? What are some actions available in this window? 

WINDOW >UNDO HISTORY. Multiple simultaneous undoes, multiple simultaneous redos, UNDO ALL, REDO ALLClear the queue.

14. What are some available options for undoing changes that are no longer available in the Undo History window? When would each option apply? 

Using FILE > Revert to Saved or Restoring from session backups. If you have saved your work after the point that you may wish to restore, Revert to saved may not take you back far enough. Conversely if you have made many changes since the last save, but you need to undo only some of those changes (no longer in the undo queue), Revert to saved will take you back too far. In these cases restoring from the session backup may be a better option.
Protools 101: lesson 8

  1. What does the Universe view display? How can you use this view to scroll in the Edit window? (See “using the universe view” beginning on page 166.) 
    • It shows an overview of your entire session. The universe few displays a miniature representation of all video, audio and MIDI clips on your tracks.
  2. What are the Timeline Selection In/Out points? How can you use them to adjust a selection? (See “selecting with the Timeline Selection In/Out” beginning on page 169.) 
    • The Timeline Selection In Point sets the selection start. The Timeline Selection Out Point sets the selection end. With any tool selected move your pointer over the blue Timeline Selection In Point or Timeline Selection Out Point in the Main Timebase Ruler – the Time Grabber tool will become active – drag either point to set selection start or end
  3. How can you make an Edit selection using the Grabber tool? (See “selecting with the grabber tool” beginning on page 170.) 
    • You can use the Grabber tool to make an Edit selection on any clip that exists on a track playlist. To select a clip with the Grabber tool, click once on the clip you want to select. The selected clip will be highlighted. To select multiple clips, click on the first of the clips you want to select and then shift+click on another clip – both clips will be selected along with all clips in-between them. (The shift modifier is commonly used for making and extending selections in Pro Tools)
  4. Describe two ways to make an Edit selection using the Selector tool. How can the the Selector tool be used to easily select an entire clip? (See “selecting with the Selector tool” beginning on page 170.) 
    • To make an Edit Selection with the Selector tool do one of the following 1. Click and drag across the area on the track you want to select. 2. click once to define a starting point of the selection and then shift+click to define an ending point
  5. How can you make a selection across adjacent tracks using the Selector tool? How can you extend a selection to a non-adjacent track? (See “making selections on multiple tracks” beginning on page 172.) 
    • By dragging vertically to select the same area across several adjacent tracks. Selecting material on non-adjacent tracks is a two-step process. After creating a selection on one or more tracks, you can add the selection to an adjacent track by shift+clicking on the track playlist with the Selector tool.
  6. What does the Link Track and Edit Selection setting do? (See “selecting material based on selected tracks” beginning on page 173.) 
    • This provides an option for sharing edit selections among tracks by selecting or deselecting the tracks themselves.This option allows you to copy a selection to another track, remove a selection from an individual track, and move a selection among tracks by selecting or deselecting track nameplates as needed.
  7. How does the Tab key affect the cursor position when working in a track? How does this behaviour change when the Tab to Transients button is active in the Edit window? (See “using the Tab key to navigate with clip boundaries” and “Tabbing to transient points” beginning on page 174.)
    • `Use Tab To advance the cursor to the next adjacent clip boundary to the right. To withdraw the cursor to the previous clip boundary to the left plus press option+TabFurthermore, to select from the current cursor position or to extend the selection to the next clip boundary to the right press shift+Tab. To select from the current cursor position or extend the selection to the previous clip boundary to the left press option+shift+TabTab to Transients is extremely useful for finding the initial peak or modulation in an audio waveform, saving time and hassle in locating the exact starting point of a sound or louder transition.
  8. How can the track height be adjusted for a track? How can all tracks be set to the same height? (See “adjusting track height” beginning on page 176.) 
    • You can select a track height at any time by clicking on the Track Options menu or the amplitude scale area of the track. You can also adjust height incrementally by dragging the lower boundary of the track. To set all tracks in the session to the same height, hold the option key while selecting the desired height on any track.
  9. Describe three ways to change the order of tracks on Pro Tools. (See “changing the track order” beginning on page 177.)
    • 1. Click on a Track nameplate and drag the track above or below other tracks in the Edit window. 2. Click on the Track Nameplate and drag the track to the left or right of other tracks in the Mix window. 3. Click on a track name and drag it to a higher or lower position in the Track List
  10. Describe the button in the Edit window to activate Zoom Toggle. What does the Zoom Toggle function do? (See “using zoom toggle” beginning on page 180.) 
    • The Zoom Toggle button is located to the left of the Zoomer tool in the toolbar are. Use the Zoom Toggle Button to toggle between the current zoom settings and a zoomed in state.
  11. What is the function of the buttons number one through five beneath the Zoom buttons? (See “storing and recording zoom presets” beginning on page 181.) 
    • Zoom preset buttons, which are used to store and recall commonly used zoom magnifications. To store a zoom setting use either the Zoom buttons or the Zoomer tool and set the screen to the desired zoom display. Hold cmd+ click one of the five Zoom Preset Buttons (or click and hold a button and select Save Zoom Preset from the pop-up menu.)
  12. What are the two main types of memory locations provided in Pro Tools? How many memory locations can you add to a session? (See “about memory locations” beginning on page 181.) 
    • Memory locations come in two main varieties – markers and selections. Markers are used to store locations on the timeline (Playback locations), while selections are used to store edit selections (Edit locations). In this lesson we will work only with memory locations. 999.
  13. How can you add a marker at the current cursor location? How can you add markers on the fly during playback? (See open “adding markers at specified points” and “adding markers during playback and recording” beginning on page 182.) 
    • Press Enter on the numeric keypad. You can also add markers on the fly in the same way
  14. Describe three ways to recall a memory location. (See “recalling a market location” beginning on page 184.) 
    • 1. Click the corresponding marker symbol in the Markers Ruler. 2. In the Memory Locations window click the entry for the desired marker location. 3. On the numeric keypad type a full stop, followed by the marker location number (1 to 999) and another full stop.

ProTools 101: lesson 7

  1. What does the term MIDI stand for? How is MIDI data different from the data stored on an audio file? (See “MIDI basics” beginning on page 134.) 
    • Musical Instrument Digital Interface MIDI data is different from data stored in audio file in that MIDI data does not represent soundwaves; instead it represents information about a performance, such as the pitch duration and intensity of the notes used . MIDI devices transmit performance data via midi instruments which are composed of 8-bit numbers (or bytes)
  2. How many channels of MIDI information can be sent over single MIDI cable? (See “MIDI basics” beginning on page 134.) 
    • 16
  3. What two types of tracks does Pro Tools provide for working with MIDI data? What is the difference between the two track types? (See “MIDI in Pro Tools” beginning on page 135.)
    •  MIDI tracks and Instrument Tracks. A MIDI track stores MIDI note and controller data only; no audio can pass through a MIDI track. MIDI tracks are often used in conjunction with Aux Input tracks for monitoring and playback of a synthesiser or virtual instrument that is triggered by the MIDI data. An Instrument track provides MIDI and audio capability in a single channel strip. This capability simplifies the process of recording editing and monitoring MIDI data
  4. How many ticks are there in a quarter note in Pro Tools? (See “Tick-based operation” beginning on page 136.) 
    • 960
  5. Describe three ways to set the Main Time Scale to Bars|Beats. (See “setting the time base ruler and main timescale” beginning on page 137.) 
    • Display the Bar |Beats ruler by choosing VIEW > RULERS > Bars |Beats then either click on bars beats in the rule of you area of the edit window, select VIEW > MAIN COUNTER > BARS | BEATS or click on the Main Counter Selector in either the Edit window or the Transport window and select Bars | Beats from the pop-up menu.
  6. What is the default meter in Pro Tools? How do you go about changing the meter? (See “setting the base meter” beginning on page 138.) 
    • 4/4 with the Meter ruler displayed in the Edit window, click on the ADD METER CHANGE button, the Meter Change dialogue box will open.
  7. What is the default tempo in Pro Tools? (See “setting the base tempo” beginning on page 139.)
    •  120 bpm
  8. What physical connections can you use to connect a MIDI controller to your system for recording on a MIDI or Instrument track? (See “connecting a MIDI device” beginning on page 141.) 
    • 5 pin MIDI, or USB
  9. Give some examples of virtual instrument plug-ins that are installed as standard components of Pro Tools. On which track types are virtual instruments plug-ins typically placed? (To see “using virtual instruments” beginning on page 145.) 
    • Xpand!2, Boom. Instrument Tracks
  10. How many parts can be included in an Xpand!2 patch? How can each part be turned on/off? (See “Working with Xpand!2” beginning on page 146.)
    • 4 parts (A, B, C, D). Sound parts can be turned on or off any time by clicking on the power button above the part letter
  11. What kind of virtual instrument is Boom? What does the Boom Matrix Display show? (See “working with boom” beginning on page 147.) 
    • Boom is a virtual drum machine featuring a selection of percussion sounds. The Boom user interface provides a simple drum-machine-style pattern sequencer. Boom comes with 10 drum kits inspired by classic electronic drum machinesThe Matrix Display on the left side of the plug-in window shows the current pattern in Boom sequencer. The matrix lets you work with patterns and keep track of each step as Boom plays. The lit LEDs in the sequencer correspond to the kit pieces that sequenced to play at that step.
  12. What track views are available for MIDI data in the Edit window? Which view allows you to scroll up or down to see notes of different pictures? (See “viewing MIDI data on MIDI-compatible tracks” beginning on page 151.) 
    • Notes view, Clips view, Velocity viewMIDI notes view shows individual MIDI notes in a piano roll format, with pitch showed on the vertical axis and duration shown on the horizontal axis. A mini keyboard on the left side of the track allows you to scroll up or down to see all pitches in the track.
  13. What track types can display data in MIDI Editor windows? (See “MIDI added to window views” beginning on page 153.) 
    • InstrumentMIDI and Aux Input tracks
  14. What is the Notation Display Enable button used for in the MIDI Editor window? (See “MIDI editor window views” beginning on page 153.) 
    • To toggle between Notes view and Notation view of the displayed MIDI and Instrument tracks

Protools 101: Lesson 5

  1. How much disk space is consumed per minute by a mono track at a sample rate of 44.1 kHz and a bit depth of 16-bit? What happens to disk space consumption if the sample rate is doubled to 88.2 kHz with the same bit depth? (See “audio storage requirements” beginning on page 96.) 
    • At a sample rate of 44.1 KHz, each track consumes approximately 5 MB of storage per minute for 16-bit audio (mono). With increasing bit depth in sample rate, drive consumption increases correspondingly; recording at a sample rate of 88.2 Khz, therefore consumes twice as much drive space as recording 44.1 kHz. Similarly recording in stereo consumes twice the space of recording in mono.
  2. How can you monitor the storage space available on your system to determine the amount of record time remaining for each mounted drive? (See “disk usage window” beginning on page 97.) 
    • WINDOW > DISK USAGE
  3. How can you create a click track for a session? What kind of track is used for a click track? (See “creating a click track (Optional) ” beginning on page 97. 
    • TRACK > CREATE CLICK TRACK (OPTIONS > CLICK to enable the CLICK track) (Alpha numeric 7 – toggle click) SETUP > CLICK / COUNT OFF
  4. What window(s) can you use to record– enable an audio track? (See “record – enabling tracks” beginning on page 100.) 
    • EDIT or MIX windows
  5. What selector can you use to route a signal from an input on your audio interface to a track for recording? (See “input path” beginning on page 100.) 
    • AUDIO INPUT PATH SELECTOR in the tracks I/O section.
  6. How can you adjust the input level going to a record – enabled track? Can you use the volume fader to achieve a strong signal going to disk? (See “input level” beginning on page 102.) 
    • By adjusting the level of your analog source, while monitoring the indicator lights on your on-screen track meter. No – Record levels cannot be adjusted within Pro Tools(For best results, aim for an average peak input level around -6DBFS, keeping the track meter in the yellow range.)
  7. How can you place a session in Record Ready mode after record–enabling a track? What modifiers/shortcuts are available to initiate recording without first entering Record Ready mode? (See “recording and managing audio” beginning on page 102.) 
    • Click the RECORD button in the Transport Window / controls in EDIT window). cmd+SPACEBAR or f12
  8. Where are recorded audio files stored for Pro Tools sessions? (See “organising audio files and clips” beginning on page 103.) 
    • Session hierarchy / AUDIO FILES
  9. What term is used to describe an unedited audio file in Pro Tools? What term is used to describe the smaller, edited pieces of the original sound file? (See “recognising audio files and clips” beginning on page 104.) 
    • Audio files / Whole-file clipsSubset / clips .
  10. What types of clips are represented by boldface text in the clip list? What type is represented by normal (plain) text? (See “recognising audio files and clips” beginning on page 104.) 
    • Whole-file clips are in boldface. All other clips are in normal type.
  11. How do track names affects the default names of the audio files you record in Pro Tools? (See “default naming conventions” beginning on page 105.) 
    • When you record audio on a track, Pro Tools names the resulting file (a whole-file clip) using the name of the track as the base name. Pro Tools also appends an underscore and take ID to the clip name.
  12. Describe two ways to rename an audio file after recording into Pro Tools. (See “changing file and clip names” beginning on page 105.) 
    • Double click the file or clip in the Edit window (with the GRABBER tool) or in the Clip listRight-clickon the file or clip in the Edit window or Clip List and select RENAME from the pop-up menu .
  13. How would you go about removing unwanted audio from the Clip List without deleting the files from disk? (See “removing audio clips” beginning on page 106.) 
    • Select the clips in the Clip List that you want to remove (to select multiple clips cmd+click, to select a continuous range click on the first clip and shift+click to the last clip) then click the down arrow at the top of the Clip List and choose CLEAR from the Clip List pop-up menu. Click REMOVE in the resulting Clear Clips dialog box.
  14. How would you go about deleting unused whole –file clips to erase from your storage drive? Can this action be undone? (See “moving or deleting audio files” beginning on page 107 .
    •  in the Clear Clips dialog box choose DELETE. NO

Protools 101: Lesson 4

  1.  What are some actions that can be initiated from The Dashboard? (See “The Dashboard” beginning on page 70.) 
    • Create a new blank session on local storage.
    • Create a new blank project, with or without cloud backup.
    • Create a new session or project from a template.
    • Open a session or project from a list of recently opened Pro Tools documents.
    • Open a project that you created or are a collaborator on.
    • Open a session from a connected storage location on your system.
  2. What is the difference between a session and a project in Pro Tools? (See “Creating and configuring a Pro Tools document” beginning on page 70.)
    •  A session file is saved to local storage. A project is stored remotely (on the cloud)
  3. What is required to create a project document? What are some reasons you might want to create a project instead of a session? (See “Creating and using project documents” beginning on page 71.) 
    • An Avid account, and Internet connection.
    • The reasons to use a project include the following:
      • a.to protect your Pro Tools work against loss in the event of Drive failure or other computer mishap.
      • b.To be able to access your projects from anywhere with an Internet connection.
      • c.You can collaborate with other Pro Tools users anywhere in the world.
  4. What are some available options for parameter settings in the dashboard? (See “Choosing parameter settings” beginning on page 71.) 
    • Create from Template, Audio file type, Sample Rate, Bit Depth, I/O settings, Interleaved, Prompt for Location, Show on Start-up
  5. What audio file types are supported in Pro Tools? What is the default file type? (See “Choosing Parameter Settings” beginning on page 72.) 
    • WAV or AIFF
  6. What is the maximum sample rate supported in Pro Tools? What is the maximum bit depth? (See “choosing parameter settings” beginning on page 72.) 
    • 192Khz. 32-bit
  7. What menu command lets you add tracks to your session? What keyboard shortcut can you use to access this command? (See “adding tracks ” beginning on page 74.) 
    •  Trackcmd+shift+N
  8. How many tracks can you add to a session at one time? (See “adding tracks” beginning on page 74.) 
    • You can simultaneously add as many tracks with as many different configurations as your session will allow(e.g. 128 Audio in PT Standard, 768 for PT Ultimate).
  9. Describe some primary track types that are available in Pro Tools. Describe the two types of folder tracks. (See “track type “beginning on page 76.) 
    • Primary Track Types: Audio, MIDI, InstrumentVideoAuxiliary, VCA, Master Fader
    • Basic Folders: purely for organisational purposes, essentially just containers for visually grouping sets of related tracks together into a collapsible view. Basic folder tracks do not have any signals rooted through them. Aside from solo and mute functionality that propagates to their constituent tracks, basic folder tracks have no mixing controls. 
    • Routing Folders: have all of the signal routing functionality of an Auxiliary input track (audio input an output selectors, insert points and send routing), along with mixing controls (Pan and Volume) and all associated automation controls in the Mix and Edit windows. Routing folders are designed primarily for sub mixing and stem mixing workflows combining key features of Auxiliary inputs and VCA master tracks with folder behaviour for organising and managing sets of tracks.)
  10. Which timebase do Audio tracks use by default? Which timebase do MIDI and Instrument tracks use by default? (See “Track Time base” beginning on page 78.) 
    • Audio tracks are Sample-based by default, while MIDI and Instrument Tracks are tick-based.
  11. What happens to the Audio and MIDI data on a track when the track gets deleted from your session? Can the Track > Delete command be undone? (See “deleting tracks” beginning on page 80.) 
    • When you delete tracks, your audio or MIDI clip data will remain in the Clip list, but your arrangement of clips on the deleted track (the tracks playlist) will be lost.
  12. Name the two types of cursors available in the Edit window. What is the difference between them? (See “controlling playback” beginning on page 80.) 
    • 1. Playback cursor
    • 2. Edit cursor. The Playback cursor is a solid, non-blinking line that moves across the screen during playback and indicates where the current playback point is. The Edit cursor is a blinking line that appears on a track playlist when you click with the selector tool in a track .
  13. Which tool can be used to set the playback point by clicking directly on a track? (See “starting and stopping playback ” beginning on page 81.) 
    • Selector Tool
  14. What is the Playback Cursor Locator used for? Where will the Playback Cursor Locator appear (in what Ruler)? (See “locating the playback cursor” beginning on page 82.) 
    • To help locate the playback cursor when it might have moved off screen after reaching the edge of the Edit window. It appears in the Main Timebase Ruler.
  15. What is the purpose of the Save As command? Which session will be opened after completing the Save As command – the original or the renamed copy? (See “save as command” beginning on page 83.) 
    • It’s useful for saving a copy of a session under a different name or in a different drive location. 
    • The Save As command leaves the original session unchanged and allows you to continue working on the renamed copy. And such, it is particularly useful when experimenting, to save alternate versions of your work. This command is also useful for saving stages of your work under different names. By working in this way you can always retrace your steps if you ever need to go back to an earlier stage of the projectIt is the renamed copy that will remain open to continue working on.
  16. What is the purpose of the Save As New Version command? What type of Pro Tools document does this command apply to? (See “save as new version command” beginning on page 84.) 
    • It provides similar benefits to the Save As command, but is available only when working on project documents
  17. How can you open a session after locating it in a workspace browser? (See “opening a session” beginning on page 86.) 
    • Double-click

Protools 101: Lesson 3

  1. What icon is used for the Zoomer tool in the Edit window? How can you use this tool to quickly zoom out, filling the Edit window with the longest track in the session? (See “Zoomer Tool” beginning on page 52.) 
    • Magnifying glass. Double click to see ALL (fn+f5 to use Zoomer)
  2. Which Edit tool is represented by a hand icon? What is this tool used for? (See “Grabber Tool” beginning on page 54.)  
    • Grabber Tool. It is commonly used for arranging clips (fn+f8 to use Grabber)
  3. Which tool is active when the Trim, Selector, and Grabber icons are all selected (highlighted in blue) in the Edit window toolbar? (See “Smart Tool” beginning on page 55.) 
    • The Smart Tool
  4. What are the four Edit modes in Pro Tools? How can you switch between them? (See “Edit Modes” beginning on page 56.) 
    •  Shuffle (fn+f1). Slip (fn+f2). Spot (fn+f3). Grid (fn+f4)
  5. Why should you use caution when editing synchronized material in Shuffle mode? When is Shuffle mode useful? 
    • Movements and edits made on shuffle mode will cause timing changes for the media on affected tracks. This mode should be used with caution when editing material that is synchronised to other tracks or are aligned to a timing reference or tempo. It’s useful as a way to make clips line up next to each other without overlapping or leaving silence between them. This can be convenient when you need to shorten a line of dialogue by removing a pause, cough repeated word, or similar unwanted material.
  6. How does editing a clip in Slip mode affect the timing of other clips on the track? (See “Slip Mode” beginning on page 56.)  
    • In Slip mode, you can move, trim, cut, or paste clips freely within a track without affecting the placement of other clips on the track. All selections, clip movements and edit operations at unconstrained
  7. When is it helpful to work in Spot mode? When it is helpful to work in Grid mode? (See “Spot Mode” and “Grid Mode” beginning on page 57.) 
    •  Spot mode lets you move and trim clips using precise locations or durations specified in a dialogue box. In Grid mode selections, clip movements, and trim operations are constrained by the grid, i.e. it is useful for quantising material.
  8. What are some ways to set the Main Time Scale in Pro Tools? (See “Main Time Scale” beginning on page 59.) 
    • VIEW > MAIN COUNTERMain TimeScale pop-up menu
  9. What are the two types of Rulers available in Pro Tools? What is the difference between them? (See “Ruler Display Options” beginning on page 60.) 
    • Timebase rulers and Conductor rulers. Timebase rulers measure time in various ways (they include Bars| Beats, Minutes: seconds, samples, timecode, timecode 2, Feet+Frames). Conductor rulers contain events that map out locations, characteristics and changes within a session (these include Markers, Tempo, Meter, Key, Chords)
  10. What are some ways to hide Rulers that you do not need displayed in a session? (See “Hiding Rulers” beginning on page 61.) 
    • VIEW > RULERSOpt+click directly on a Ruler’s name in the Timeline display area.
  11. Which Pro Tools windows provide access to MIDI controls, such as Wait for Note, Metronome, and MIDI Merge? (See “MIDI Control Features” beginning on page 62.) 
    • The MIDI Control section in the Edit and Transport windows
  12. What is the purpose of the Metronome button in the MIDI Controls area? What kind of track must be added to a session for the Metronome button to work? (See “Metronome” beginning on page 62.) 
    • The metronome button is used in conjunction with a click track and controls whether or not the click will be audible. When the Metronome button is active, a metronome click will sound during playback and recording, as specified by the settings in the Click/Countoff options dialog box (SET-UP > Click/ Countoff). Metronome playback requires a click track on the click source to be configured for your session.
  13. What are the two states or modes available for controlling the current session tempo? How can you switch between these modes? (See “Tempo Ruler Enable” beginning on page 63.) 
    •  Tempo Map Mode and Manual Tempo Mode
  14. What is displayed by the Tempo field in the MIDI Controls area? What are some ways to set the session tempo using this field? (See “Tempo Field” beginning on page 64.) 
    • The session’s current tempo based on the play selection. In manual tempo mode (or when the session tempo has not yet been defined) you can enter a BPM value directly into this field. In addition when the tempo field is selected, you can tap in a tempo from a midi controller or from the computer keyboard using the T key

Protools 101: Lesson 1

  1. Name and describe five types of production tasks that ProTools can be used for.
    •  audio processing, MIDI Production, Notation and Scores, Mixing and automationAudio for video and post production
  2. What’s the frequency range of human hearing? 
    • 20 Hz – 20,000 Hz (or cycles per seconds – CPS)
  3. What does the frequency of a sound wave affect in terms of how we perceive the sound? How is frequency measured? 
    • Pitch
    • measured in cycles per second (CPS) or hertz (Hz)
  4. What does the amplitude of the sound wave affect? How is amplitude measured? 
    • Loudness/Volume
    • Measured in decibels
  5. How does the sample rate of a system relate to the frequency of audio it can capture? What is the name of the law that specifies the relationship between sample rate and audio frequency? 
    • The sample rate of the system should be twice the frequency of audio it is required to capture. NYQUIST Theorem
    • Sample rate: the frequency of digital measurements of audio
    • Nyquist theorem: sample each cycle at least twice to capture the audio frequency
    • Minimum sample rate: Sample rates must be at least 40 kHz for full spectrum audio.
  6. How does the bit depth relate to the dynamic range of audio it can capture. How can you estimate the dynamic range of a system? 
    • the more binary digits included in the bit depth, the greater the accuracy of each sample measured.
    • For example a 4-bit word (2 to the 4th power) can represent 16 discrete amplitude levels. A 16-bit word could represent 65, 536 levels (2 to the 16) and a 24-bit work can define more than 16 million discrete amplitude levels (2 to the 24)
  7. What are some common digital connections available on Pro Tools audio interfaces? What type of connector jack does each use? 
    • Digital audio connections: S/PDIF (uses RCA or coaxial jacks), AES/EBU (uses XLR-type connectors)
  8. Name some audio interfaces that are compatible with standard Pro Tools software. 
    • Mac – any interface with a supported core audio driver
    • Windows – any interface with a supported ASIO driver
    • Often powered by the USB Bus
    • Up to 32 Channels of simultaneous I/O
  9. Name some Avid audio interfaces that are compatible with Pro Tools | Ultimate software. 
    • Protools | HD OMNI
    • Protools | HD I/O – Available as 8x8x8 (8 analog in, 8 analog out, 8 digital in/out), 16×16 analog and 16×16 digital
    • Protools | HD MADI – 64-channel digital interface
    • Protools | HD MTRX
    • Protools | HD MTRX Studio

Sonic Response

For my sonic response to the last workshop, we had with Ingrid, I decided to use an obsolete media that I was familiar with after attempting to work with minidiscs. For my response, I made multiple tape loops and recorded them as the base for my composition. For the main loop, I made a Mobius strip loop which lasted around 12 seconds, from some old tape I had not used.

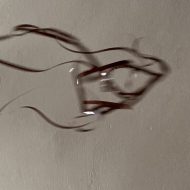
The mobius strip loop (twist at the top)

I placed this over a field recording of some birds in the countryside and noticed that it produced an almost meditative soundscape of natural sounds juxtaposing the mechanical analogue imperfections of the tape recorder. I then recorded some guitar over the recording and loops to flesh out the composition rather than it becoming a three-minute dissociative trance, but I still feel it has a meditative quality to it.

Link to the Audio:

https://artslondon-my.sharepoint.com/:u:/g/personal/c_spence0820191_arts_ac_uk/EU3FZ2iTQpRKklm4IA3S6uQBwLQGz7kjTw6S5VytMXD37A?e=q1Says

When thinking about how I can make sustainable sound art, I am in two minds on whether making this type of art, using obsolete technologies is really a sustainable practice? On one side I have used an old technology that many people would consider just landfill, and I have prevented that from happening and therefore being sustainable. But on the other hand what will happen now that I have made this? I do work with tape quite a lot and usually, any leftover tape from my loops or splicings get thrown away, I have only saved a 5-10 second portion of what once was a 90-minute tape. I would also like to consider what will happen to my recorders and players once I have finished with them or they break. It will most likely just end up as landfill again. By making art from the obsolete I don’t feel that I am necessarily being sustainable, I feel more like I am just acting as a buffer for the inevitable.

Chapter 4

For the fourth Chapter of my audio drama, I wanted the scene to be acted rather than described by the narrator. This scene being the climax of the story taking place in the hotel. I originally wanted this scene to play out in 5.1 with each character taking a point of the triangle created by the centre channel and the left and right surround channel. however, in practice, I could not get it to sound quite how I wanted with the atmos of foley tracks as well. So I instead opted to create a binaural mix of the scene making use of the Dear VR plugin that we explored in Gareth’s Spatial sound sessions. I automated sounds of footsteps and movements of the characters around the listener using the binaural pan to immerse the listener within the scene.

For the voice actors, I used myself as multiple different voices such as the people in the bar area, as well as the barman and Jack. Rosie played Celeste and Micheal (Technician) played the Sherrif and my partner Sam as the voice for Emmeline. I think the biggest challenge for this scene was to make my voice sound different enough for each Character so the listener wouldn’t become confused between each character. I resolved this (hopefully) by using slight pitch effects to my voice to change them just enough to sound distinct. Placement of the characters around the binaural field also helped to distinguish each character for the listener.